Friday, August 25, 2017

Dooodlebug Off The Page Personalized Kids Wall Art

Hi there!  I'm over on the Doodlebug blog today with a fun idea for kid's room decor using their adorable Fairy Tales collection!  

I bought these 12" high wood monogram letters at my local craft store just over five years ago when we moved to a new home, but sadly the project kept getting pushed to the back burner.  I decided it was time to finally decorate them for my daughter before she's too old to enjoy them or leaves home.  ;)


Doodlebug Design Fairy Tales Personalized Kids Room Wall Art by Mendi Yoshikawa

For all of my letters, I started by tracing them face down onto the backside of the papers I wanted to use.  I then fussy cut them out and stitched around the edge of each of them before adhering them to the wood piece with liquid adhesive.


Doodlebug Design Fairy Tales Personalized Kids Room Wall Art by Mendi Yoshikawa

I wanted to have each letter be embellished in a unique way, but have them come together in one cohesive project.  For the letter "A" I pulled out bits of ribbon from my stash and wrapped the pieces around to the back of my paper cutout before adhering them to the wood.


Doodlebug Design Fairy Tales Personalized Kids Room Wall Art by Mendi Yoshikawa

Three simple, yet completely adorable flower buttons dress up my letter "Y".


Doodlebug Design Fairy Tales Personalized Kids Room Wall Art by Mendi Yoshikawa

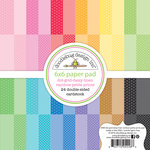
For my "L" I die-cut 4 diamonds from my favorite petite prints and stitched around them before adhering them to my piece to form an argyle print.  I then used some of the adorable sprinkles from the collection to embellish them.


Doodlebug Design Fairy Tales Personalized Kids Room Wall Art by Mendi Yoshikawa

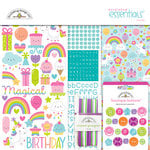
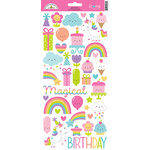
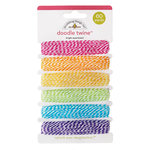
For my letter "E" I used a swiss dot print with some of the darling icon sticker balloons and the unicorn from the odds & ends pack.  Before adhering the letter to the wood, I poked holes on either side of the balloons and stitched around them using an embroidery needle to give the appearance the baker twine strings are tied on.


Doodlebug Design Fairy Tales Personalized Kids Room Wall Art by Mendi Yoshikawa

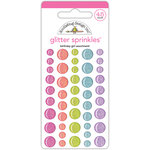
I kept my last letter fairly simple since the print had a lot going on visually.  I added some random glitter sprinkles from the collection to give the polka-dots extra interest.  I love the way they look!


Doodlebug Design Fairy Tales Personalized Kids Room Wall Art by Mendi Yoshikawa

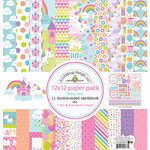
This collection makes this 80's girl with her rainbow heart skip a beat!  I hope I've inspired you to use some of your favorite Doodlebug papers for a home decor project too!  


Interested in the products I used to create my projects today?  To make supplies easier for you to find, I have listed them below (affiliate links included). 

Supplies Used (available at Scrapbook.com)

Tuesday, August 8, 2017

Doodlebug Cherry Layout & Stitching With Baker's Twine

Hi there!  I'm on the Doodlebug blog today sharing a happy layout using hand-stitching with baker's twine.  As we transition to back to school I thought it would be fun to document some photos from a few years back.  

Doodlebug Design Cherry Themed Layout by Mendi Yoshikawa using Stitching with Baker's Twine

I took my inspiration from a cherry sequined top my daughter is wearing and die-cut just the cherry portion from the background of my page using THIS cutting file.  I then cut a generous piece of red cardstock an inch or two larger than the cherries.  I covered the entire piece of cardstock with adhesive using my ATG gun and added rows of Doodlebug's ladybug sequins, leaving the outside edge without sequins so I could adhered it to the back of my page.

Doodlebug Design Cherry Themed Layout by Mendi Yoshikawa using Stitching with Baker's Twine

When I was done, I added the remaining die-cut pieces cut using Doodlebug's Petite Prints papers and stitched around the outside edges with green and red baker's twine.  

Doodlebug Design Cherry Themed Layout by Mendi Yoshikawa using Stitching with Baker's Twine

To create my title I first printed it out in Microsoft Word using the Clicker Script font.  I then used some washi tape to temporarily adhere it to my layout and "traced" around it using my paper-piercer to form my stitching holes.

Doodlebug Design Cherry Themed Layout by Mendi Yoshikawa using Stitching with Baker's Twine

Here's a finished look at my title using Doodlebug's solid white baker's twine. I learned as I went that it helps to make the spacing between your holes a little larger and deeper to keep the thread from getting stuck and to keep the paper from tearing.  If my paper ever tore, I simply added some packing tape to the back and re-stitched that spot.  ;)

Doodlebug Design Cherry Themed Layout by Mendi Yoshikawa using Stitching with Baker's Twine


Thanks so much for visiting the blog today.  I hope I've inspired you to try some hand-stitching on your own projects.  It's seriously addicting!


Interested in the products I used to create my projects today?  To make supplies easier for you to find, I have listed them below (affiliate links included). 

Supplies Used (available at Scrapbook.com)


Tuesday, August 1, 2017

A Summer Card using New Nuvo Aqua Flow Watercolor Pens

Hello there!  I thought I would pop in with a non-design team project for once and share a card I made for fun using a challenge kit from my local scrapbook store.  

For the challenge we were each given a 4x3 piece of double sided patterned paper, an 8" piece of pineapple washi tape, the happy die-cut word and a piece of 6x6 navy cardstock.  The rules are we must use a little bit of everything they provide so here's what I came up with...
Sunny Studio Stamps Tropical Paradise Card by Mendi Yoshikawa using Tonic Nuvo Aqua Flow Pens

I have been dying to play with my new Nuvo Aqua Flow watercolor pens and Aqua Shimmer pens by Tonic all summer long and I was so happy I finally found a little downtime to enjoy them.  


Tonic Nuvo Aqua Flow Summer, Fall & Winter Watercolor Pens


I started by stamping the images from my Sunny Studio Tropical Paradise stamps with VersaMark ink onto Bristol paper and then heat embossed them with white embossing powder (On a side note, I tried them on standard cardstock, but they didn't move with water well that way and they are really designed to work best with watercolor paper or the smooth Bristol paper that is heavy enough to take the extra water).

I then added a small line of color using the pens and softened the colors with a paintbrush and water.  Sometimes, I reversed the order and added water and then brushed in some color and allowed the color to move with the water.  I'm not the best at watercoloring so I love that the raised embossing lines gave the color a boundary making it so much easier to stay in the lines.  

Even though I currently only have three of the four sets, I was able to achieve a lot of different colors by mixing my colors.  Here's a little chart to see how the colors look straight out of the pen and then blended with water.

Tonic Nuvo Aqua Flow Watercolor Summer, Autumn & Winter Pens Color Chart


When they were dry, I then went back with the clear Aqua Shimmer pens to add some sparkle to my flowers, leaves and pineapple.  I really like how the shimmer pens are completely clear and didn't alter the colors of my flowers.  I found they also didn't really move around the color of my previous layers by much so I think they aqua flow pens color is set once it dries.  

Here's a comparison on how they look on white vs. black cardstock:

Tonic Nuvo Aqua Shimmer Clear Glitter Sparkle Pens on White

Tonic Nuvo Aqua Shimmer Clear Glitter Sparkle Pens on black

For the inside of my card I used the piece of washi tape mounted on a piece of white cardstock and used an extra flower to carry my theme throughout.

Sunny Studio Stamps Tropical Paradise Card by Mendi Yoshikawa using Tonic Nuvo Aqua Flow Pens


I would really recommend taking a closer look at these.  They are a very affordable option to coloring in stamped images, blended beautifully and were super fun to play with!


Interested in the products I used to create my projects today?  To make supplies easier for you to find, I have listed them below (affiliate links included). 

Supplies Used (available at Scrapbook.com)

Related Posts Plugin for WordPress, Blogger...